Android
Android App Customization and Submission Guide
This guide outlines the steps to customize the K12NET app with your school’s branding and submit it to the Google Play Store. By using PWABuilder.com for app packaging and following the steps below, the process will be smooth and efficient.
Preparation: Ensure you have a Google Play Developer account and Android Studio (latest stable). Familiarize yourself with Play Console requirements and App Bundle (AAB) submissions.
Step 1: Customize Your App with PWABuilder
- Go to PWABuilder.com.
- Enter the URL of your K12NET PWA and initiate the analysis.
- After the evaluation, proceed to build your Android package, customizing icons, splash screens, and other settings as required.
- Make sure to provide your existing signing key information (key alias, key password, store password) during the PWABuilder build process if you want to use your own signing key.
- Download the Android project package provided by PWABuilder.
Step 2: Open and Configure Your Project in Android Studio
- Open the downloaded project in Android Studio.
-
Modify the
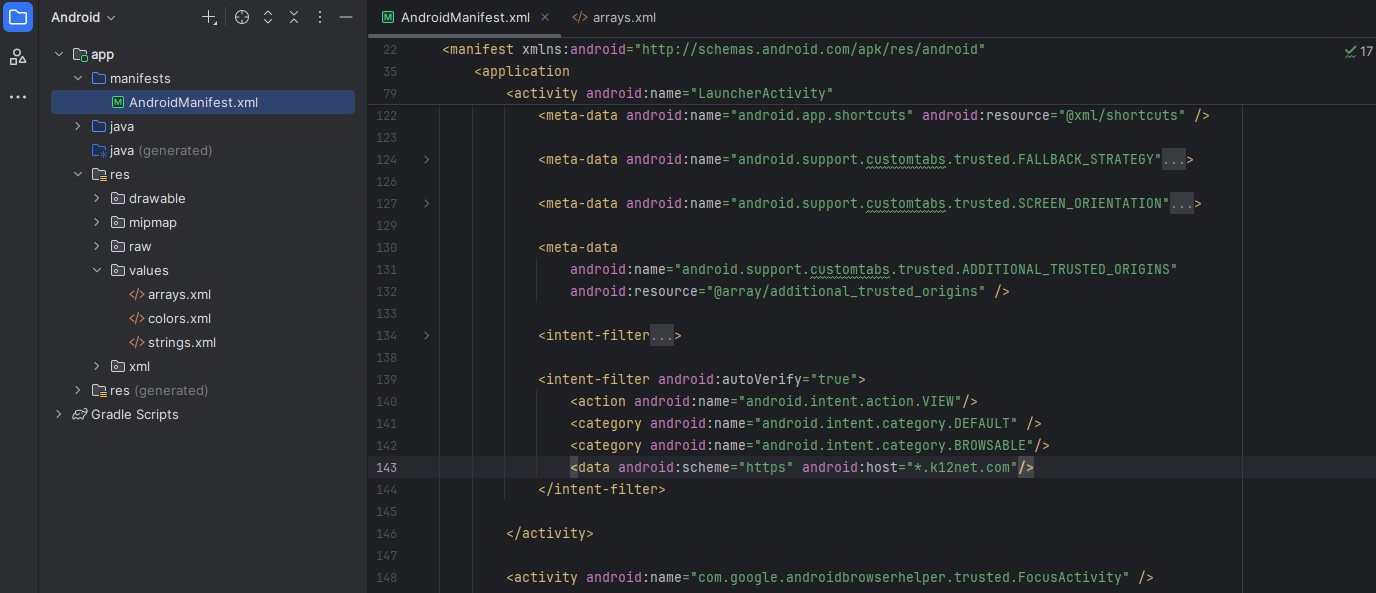
AndroidManifest.xmlfile located atapp/src/main/AndroidManifest.xml. Update the data element of the intent filter which hasautoVerifyattribute to ensure links from k12net.com domains open within the app's webview. The updated version of the intent filter is displayed below:<intent-filter android:autoVerify="true"> <action android:name="android.intent.action.VIEW" /> <category android:name="android.intent.category.DEFAULT" /> <category android:name="android.intent.category.BROWSABLE" /> <data android:scheme="https" android:host="*.k12net.com" /> </intent-filter> -
Create
app/src/main/res/values/arrays.xmland add the following content to define additional trusted origins. Make sure the first element in the array is the school's specific subdomain that you are customizing the app for:'<?xml version="1.0" encoding="utf-8"?> <resources> <string-array name="additional_trusted_origins"> <item>https://school-subdomain.k12net.com</item> <item>https://okul.k12net.com</item> <item>https://fs.k12net.com</item> <item>https://fs-static.k12net.com</item> <item>https://er.k12net.com</item> <item>https://sss.k12net.com</item> <item>https://lgssonuc.k12net.com</item> <item>https://itemeditor.k12net.com</item> <item>https://eokul.k12net.com</item> <item>https://tanitim.k12net.com</item> <item>https://support.k12net.com</item> <item>https://yardim.k12net.com</item> <item>https://azure.k12net.com</item> <item>https://azurefs.k12net.com</item> <item>https://azureer.k12net.com</item> <item>https://educore.com</item> <item>https://api.k12net.com</item> </string-array> </resources> -
Add the ADDITIONAL_TRUSTED_ORIGINS meta-data entry to the
AndroidManifest.xmlfile within the Launcher activity (manifest/application/activity with intent filter for MAIN/LAUNCHER):<meta-data android:name="android.support.customtabs.trusted.ADDITIONAL_TRUSTED_ORIGINS" android:resource="@array/additional_trusted_origins" /> -
These entries ensure that links from these domains remain within the app's webview and do not open another instance.
Here is a screenshot showing where to make these changes:
Step 3: Add query string to the launching page URL
-
To notify the web application that it is being opened inside the K12NET Android app, append the query string
?source=TWAto the launching page URL. -
Update the
getLaunchingUrlmethod in the LauncherActivity.java file located atapp/java/your-package-name/LauncherActivity.javaas shown below:protected Uri getLaunchingUrl() { Uri launchUri = super.getLaunchingUrl(); Uri.Builder builder = launchUri.buildUpon(); builder.appendQueryParameter("source", "TWA"); return builder.build(); }
Step 4: Configuring Digital Asset Links
- For verified links and a toolbar-free experience, each origin the app should treat as trusted must host a valid /.well-known/assetlinks.json that includes your package name and SHA-256 certificate fingerprint.
- You need to provide us with your app's package name and SHA-256 certificate fingerprint so we can generate the appropriate assetlinks.json files for each trusted origin.
-
You can find your SHA-256 certificate fingerprint using the following command if you provided your existing signing key file, and fill in your existing signing key information (key alias, key password, store password) during the PWABuilder build process:
Please check this link for more details: Update your asset links file for productionadb shell pm get-app-links PACKAGE_NAME
Step 5: Test Your App
- Run the app on an Android device or emulator to ensure all customizations are correctly applied and the app functions as expected.
- Make sure that no browser toolbar appears when navigating to k12net.com links.
- Test links from k12net.com domains to confirm they open within the app's webview.
Step 6: Prepare for Release
- Generate a signed App Bundle (AAB) for release by following Android Studio's guidelines.
- Ensure all app details, screenshots, and promotional materials are ready for submission to the Google Play Store.